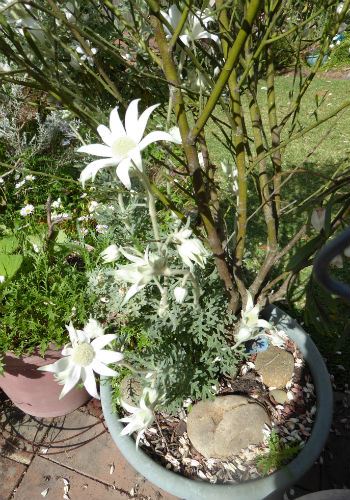
Elsie from the Central Coast group is a whizz as propagating and growing flannel flowers. Here are her secrets!
Growing Flannel Flowers
Several people have asked me recently to write down the methods I use to grow flannel flowers. I have had some success with them so here is my story.
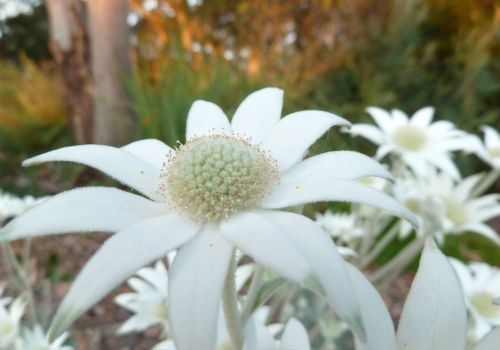
Some years ago we had the Flora Festival which was held annually at the exhibition grounds at Kariong. In those days, Madeleine Leonard of Sandstone Natives supplied us with top quality flannel flowers. She would send us more than a hundred and they would sell out on the first two days of the Festival.
In 2012 Madeleine retired from growing plants to pursue a different career which was the same year as the Flora Festival folded. However, she sent down all her flannel flower growing gear as well as fresh seed and instructions for us to grow them ourselves.
Our first efforts proved to be quite dismal with about a 98% failure rate but we persisted. Back then the seed was first rubbed through a sieve and several different potting mix combinations were trialled.
A lot germinated but most were lost at the pricking out and potting up stage. With the Flora Festival no longer in existence, those that survived were planted out into the garden. I’d left the seed trays sitting in the sun while waiting for more to germinate and after 6 months, no more seeds were germinating, so I emptied the potting medium into an empty potting mix bag and set it aside to use for something at some later date.
Six months or so later, I potted up some plants into larger pots and used the set-aside-potting mix to top up the pots. Flannel flowers started emerging in these pots a few weeks later and I successfully pricked out and potted up about 40 seedlings. At that stage the potting mix with the treated seed in it was well over 12 months old.
Over the last three or four years I’ve learned a lot and go close now to having a 90% success rate.
My seed preparation method
Rub the seeds around a large 30cm wire strainer. (This large wire strainer is available at the Red Dollar Shop at Erina Fair for a couple of dollars).
Then empty the seed into a container, cover with water with a few drops of Wetta Soil added and leave overnight. The Wetta Soil helps to break down the protective coating around the seed and this hint originated from Maria Hitchcock, leader of the Waratah and Flannel Flower Study Group.
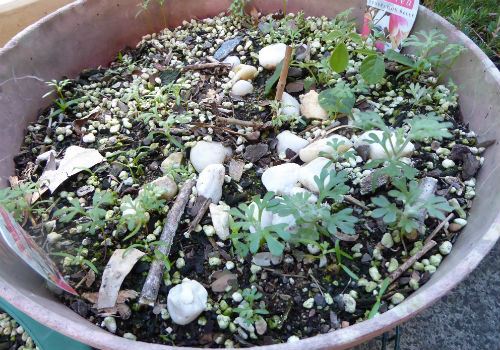
Tip them back into the strainer to drain and leave to dry. When dry lay the seed into the potting medium. I have had more success recently sowing the seed into a large round daisy bowl. I use a mix of equal parts of standard potting mix, coir and sand and add some perlite.
Water with a little Seasol, smoke water or Seed Starter.
Important Points
Seed needs to be fresh, no older than 6 months.
The seed will start to germinate after about 30 days but can still germinate after 12 months so don’t give up on them.
Seed will only germinate when conditions are favourable.
Seed will not germinate if the temperature is higher than 30 deg.
Seed that I put down in August 2016 started germinating in June 2017, 10 months later.
Flannel Flowers are heavy feeders so fertilise regularly.
Madeleine used the ‘rubbing the seed through a sieve method’ only and she grew the most amazing flannel flowers.
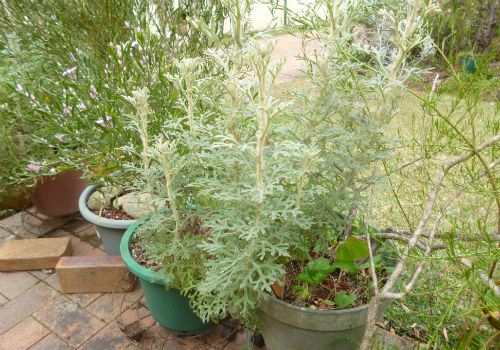
I have just sown a lot of seed into two daisy bowls. I have one sitting in full sun and the other in the shade so will see which one is more successful.
Good luck!
This article first appeared in the Central Coast Group’s February 2018 newsletter. For more information on Central Coast Group, please visit the website. Click here: https://www.austplants.com.au/Central-Coast