At the quarterly gathering in March, Heather Miles gave an interactive talk on designing your native garden. She had handouts, paper, pens, design books and other helpful materials ready for the large group of APS members who attended to all think about (re)designing areas of their own gardens.
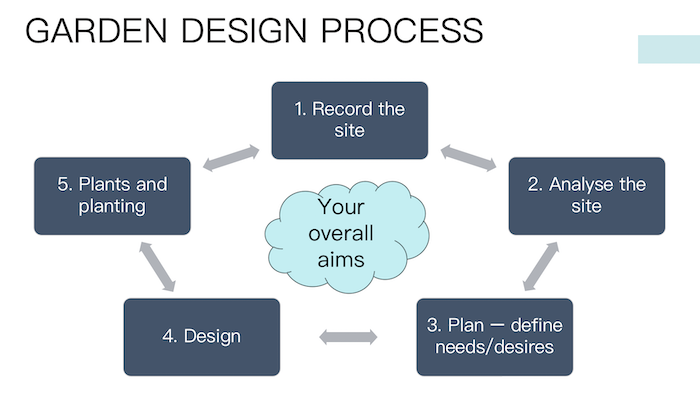
Heather asked us to start by thinking of an area in our gardens we wanted to design, or overhaul. So, how do we (re)design a garden? There are 5 steps. Often we start with the plants and just chuck them in, but that doesn’t always work so well. Heather says there are many garden design books, some of which have exotic plants in them, but don’t hold that against them! They are very good to help with overall design, and you can pick your own plants. These sorts of books are worth picking up if you come across them in your local secondhand stores.
Firstly, you start by defining your overall aims for the project. What do you want to achieve? What moods or emotion do you want to create? Big needs? Functions of the space? Start high level. Write these all down, and refer back to them as you move through your design steps.
Here is an approach, that Heather has borrowed from Lawrie Smith. She brought along some copies of his notes to share around, and a worksheet. View Heather’s notes and the worksheet:
The interesting thing to note is that design doesn’t actually happen until step 4!! And plants are Step 5. However success in garden design comes from going through steps 1, 2 and 3 first – this gives the grounding and facts you need to make good design decisions.
The 5 design steps
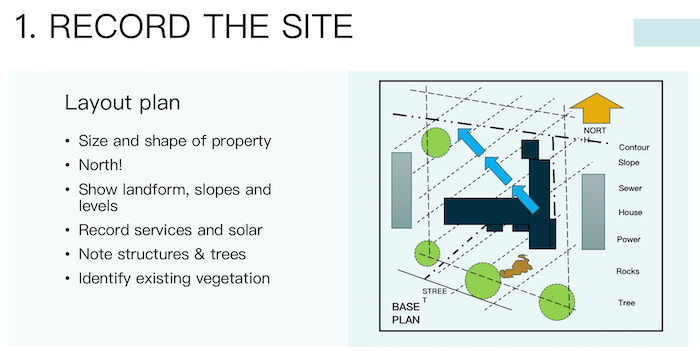
1. Record the site
The first thing to do is to develop a layout plan. This sounds tedious, but does give you the chance to understand where the house is, the shape of the block, where there are existing trees. It’s essentially the stocktake of the site. It is amazing the insight it gives you to see everything top down.
This also allows you to think about whether you have to remove trees or move anything around. You can often start with the house plans and use tracing paper to draw over them.The things to think about when you develop your layout plan are:
Size and shape of property
Where is north?
Show landform, slopes and levels
Record services and solar
Note structures and trees
Identify existing vegetation
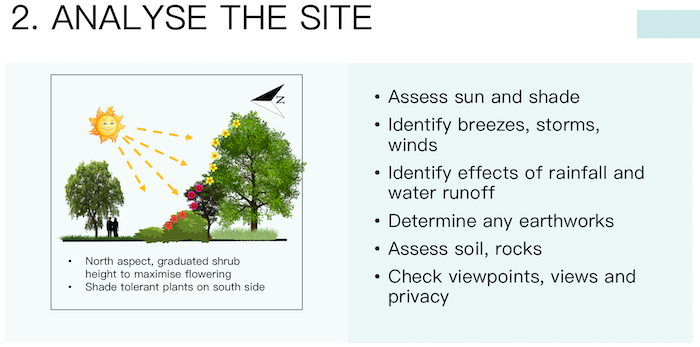
2. Analyse the site
The next step is to analyse the site. Many Australian plants need good sun and so figuring out where that sun comes from seasonally is very useful. Identify where the wind blows from and where the water flows. Look at what earthworks might be required. And soil is essential to evaluate – what kind of soil – sandy, sandy loam, clay – light or heavy – these factors all influence you ultimate plant choices. This kind of analysis also lets you start assessing the microclimates – different plants for different microclimates. Viewpoints is an important topic. We are not outside all the time – sometimes we are inside looking out. What are your viewpoints and how might that change your ultimate design. Of course, views and privacy are critical. The things to consider in this step are:
Assess sun and shade
Identify breezes, storms, winds
Identify effects of rainfall and water runoff
Determine any earthworks
Assess soil, rocks
Check viewpoints, views and privacy
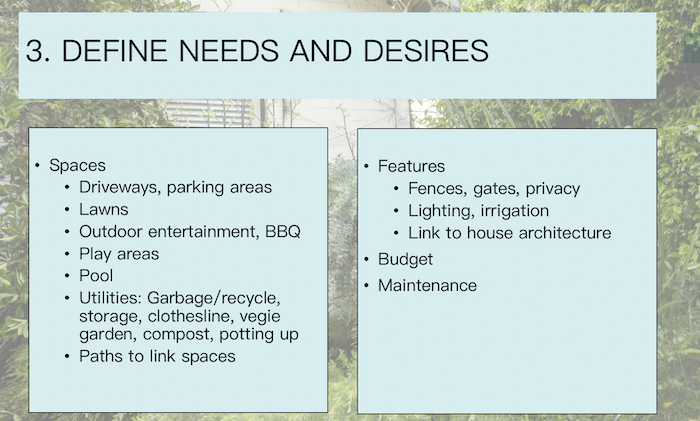
3. Plan – Start to define your needs/desires for the space.
a) Spaces – do you need any of these? Where should they go and what would they ideally be like?
Driveways, parking areas
Lawns
Outdoor entertainment, BBQ
Play areas
Pool
Utilities: Garbage/recycle, storage, clothesline, vegie garden, compost, potting up
Paths to link spaces
b) Features – What about these?
Fences, gates, privacy
Lighting, irrigation
Link to house architecture
c) Budget – a crucial element! It’s no good developing a plan that you don’t have the means or desire to fund.
d) Maintenance – thinking about access and planning for the maintenance level you are willing to commit.
4. Design
Style / Theme influences everything. What style do you want? Formal? Informal? Naturalistic/wild? Heather says it is an oversimplification of the many many design styles available, however she finds generally most designs do fall into one of these three categories.
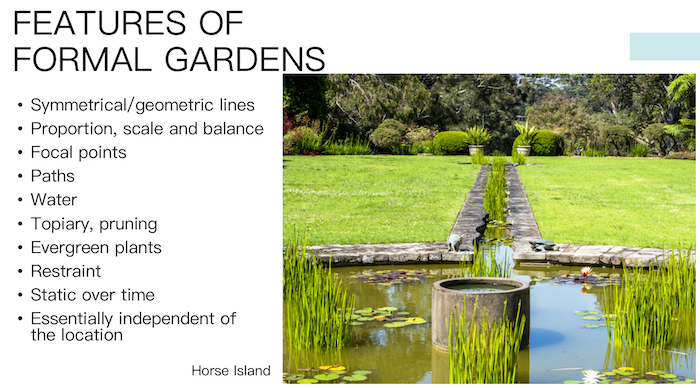
1) Formal gardens
Symmetrical/geometric lines
Proportion, scale and balance
Focal points
Paths
Water
Topiary, pruning
Evergreen plants
Restraint
Static over time
Essentially independent of the location
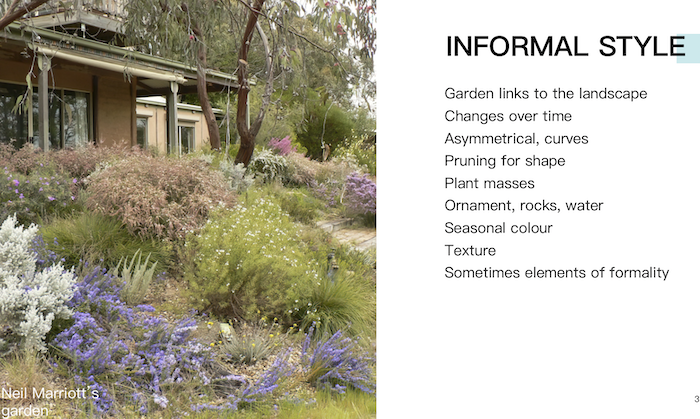
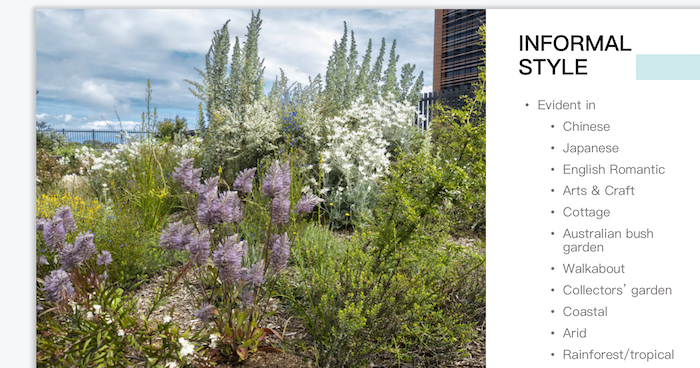
2) Informal style
Garden links to the landscape
Changes over time
Asymmetrical, curves
Pruning for shape
Plant masses
Ornament, rocks, water
Seasonal colour
Texture
Sometimes elements of formality
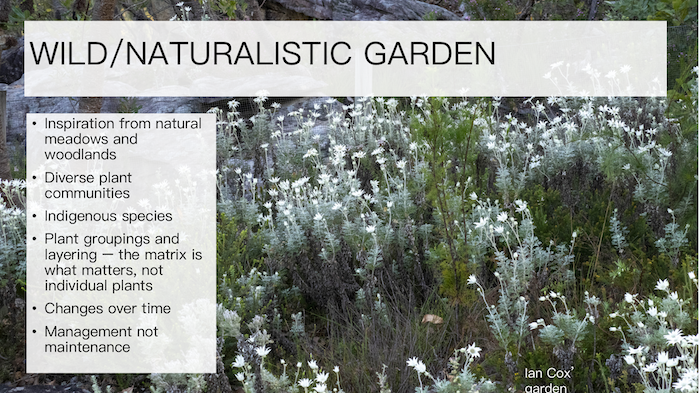
3) Naturalistic / wild
Inspiration from natural meadows and woodlands
Diverse plant communities
Indigenous species
Plant groupings and layering – the matrix is what matters, not individual plants
Changes over time
Management not maintenance
The design elements to think about are:
Hard landscape – walls, fences, paths, gates, patios
Rocks
Water – ponds, waterfalls, dams, streams
Colour, ornaments, seats, pergolas
Formal garden elements
Informal garden elements
Informal garden elements
Wild garden elements
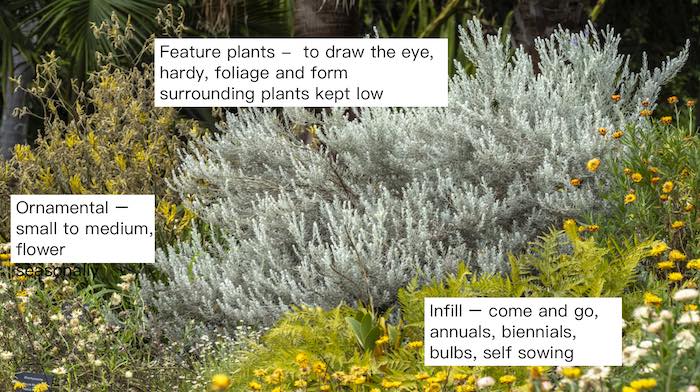
5. Plants and planting
Heather encourages us to plant all forms!
Trees
Most significant plant with its own form, texture, colour and scent – individually or in groups
Act as focal points, habitat, screen, windbreaks, shade, shelter
Give structure and height
Can create vistas
Always try to maintain a mature tree if possible
For new trees, map their final size
Framework – Shrubs and groundcovers
Bind the garden together
Link to landscape
Year round colour and texture
Shelter
Repetition
She gives us some tips on plant selection and says we should research the plants, we have so many great resources for this in APS with our plant database and ANPSA has plant profiles too.
Where from? Local, native
Preferred conditions?
How big?
Adaptable to pruning etc?
Form, foliage, flowers, fruits, bark?
Where are flowers and when?
Bugs, diseases?
Listen to the plants
Layers of plants
And what could we end up with when we have completed these steps, whether you’ve had this completed professionally or done it yourself?
A design of the site
Some elevations or sketches to simulate what it looks like
Some pictures of suggested plants
Planting lists
And possibly an invoice!
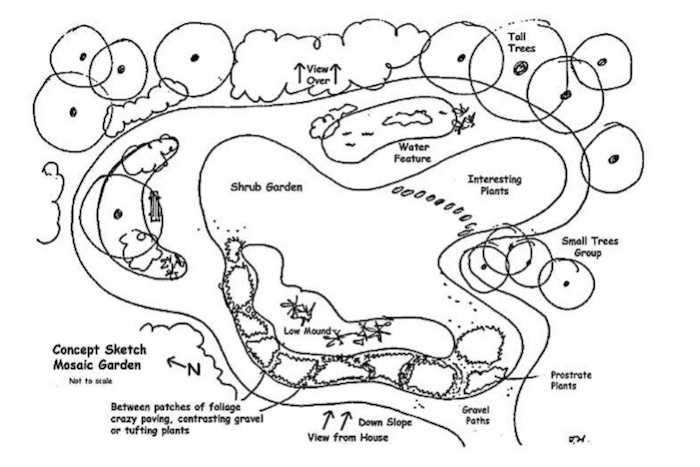
Even if you don’t end up with a ‘formal’ design project output, you can get quite far using the simple steps above. And to start off with, you may use bubble diagrams which are more free form birds eye view sketches of the site. You can create a number of different designs easily to see which is preferred before moving to formalising computer designs, and creating top down sketches really helps you to see what the design will look like and how things fit.
Example of a bubble diagram
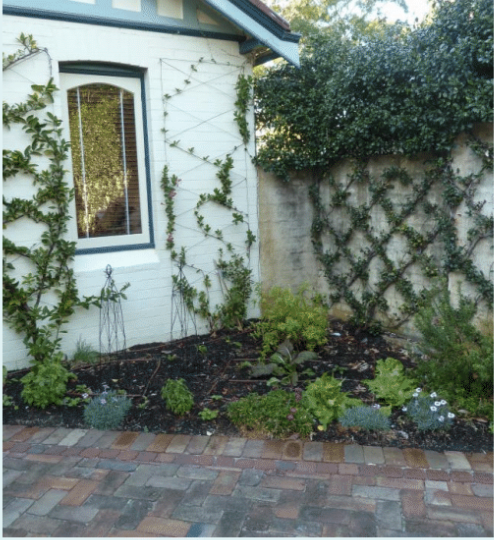
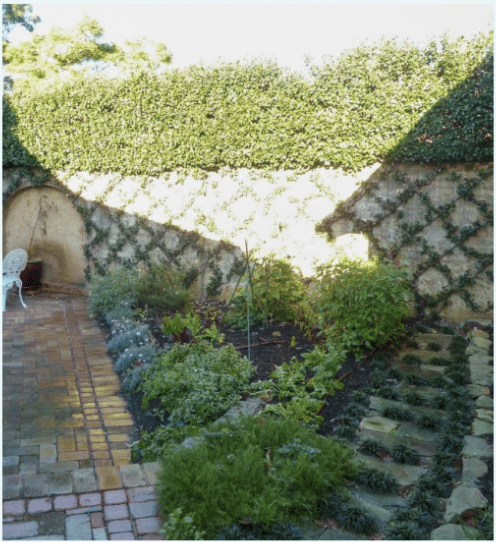
Case study: South facing courtyard
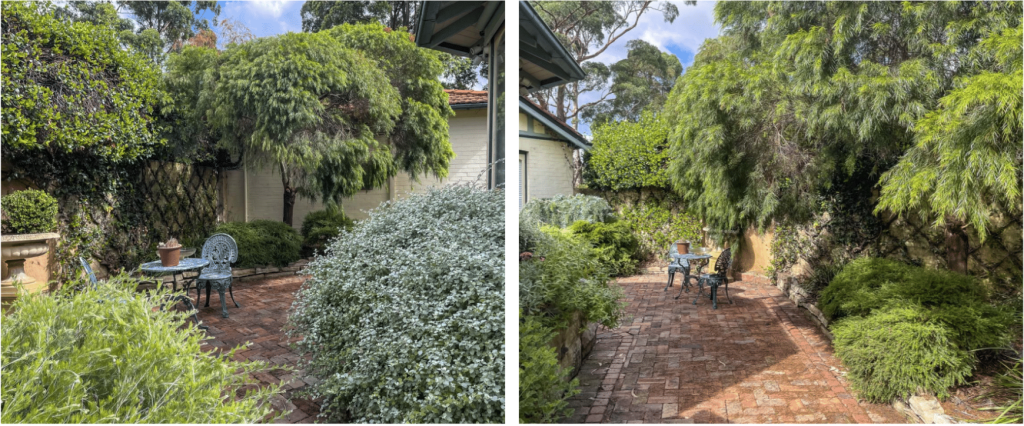
Heather gave us the example of how she revamped her own garden at her Sydney home. It was a south facing courtyard, brutally hot in summer and shaded all winter. The view from inside was pretty ordinary. She discovered it was full of builders rubble and scoria, so planted some WA plants and local indigenous plants, which thrive on good drainage and low nutrition. She transformed it from a pretty average cottage garden with lots of exotics to a lush and enjoyable mostly native garden. It took a number of tries to get it right though, observing what worked and what didn’t and altering as she went along.
Before:
Random planting, no
edging,
poor soil
Very hot in summer and no sun in winter, slippery
Needs to look good from
inside (viewpoint)
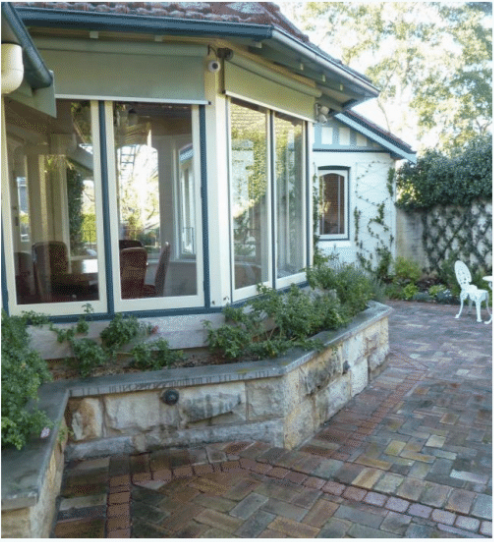
After:
Revamped garden
Over the last 20 years, Heather has designed and built a native garden on her property in the Hunter Valley. One member asked Heather about what errors she made designing her garden.
Heather says she planted Red cedars (Toona ciliata) along the driveway but they should have been planted further from the eventual driveway. Now they are growing well and have to be constantly pruning to ensure access to the property, particularly in the case of bush fire.
There are not enough seating places that give good views, a requirement of a walkabout garden.
She also didn’t think about features – viewpoints from house, although some are ok.
She planted three Bottletrees (Brachychiton rupestris) as a feature. One got eaten down by the wildlife and she thought it had died, so planted another. However, the eaten one came good and the new one turned out to be a different Brachychiton, or at least a different form. All have grown much bigger than expected and now views to the garden and pond are blocked.
Someone also asks Heather what she means when she talks about anchoring the house and she explains this means settling the house into the landscape so it doesn’t stand out.
Hopefully this has given you a taste of the wonderful presentation that Heather gave and inspired you to re(design) an area of your own garden.
There are a lot more resources available on the Garden Design Study Group webpage. See here for more information on the Group and it’s revamped site, which is looking fantastic!